A bathroom remodel is an excellent way to add style and increase your home’s value. While the cost of a renovation can be substantial, in the right market, you can recoup 60% to 70% of your investment.
Minor updates like faucets and toilets are relatively simple for DIYers to take on alone. However, a complete remodel is a more significant undertaking that may require a contractor to complete within building codes.
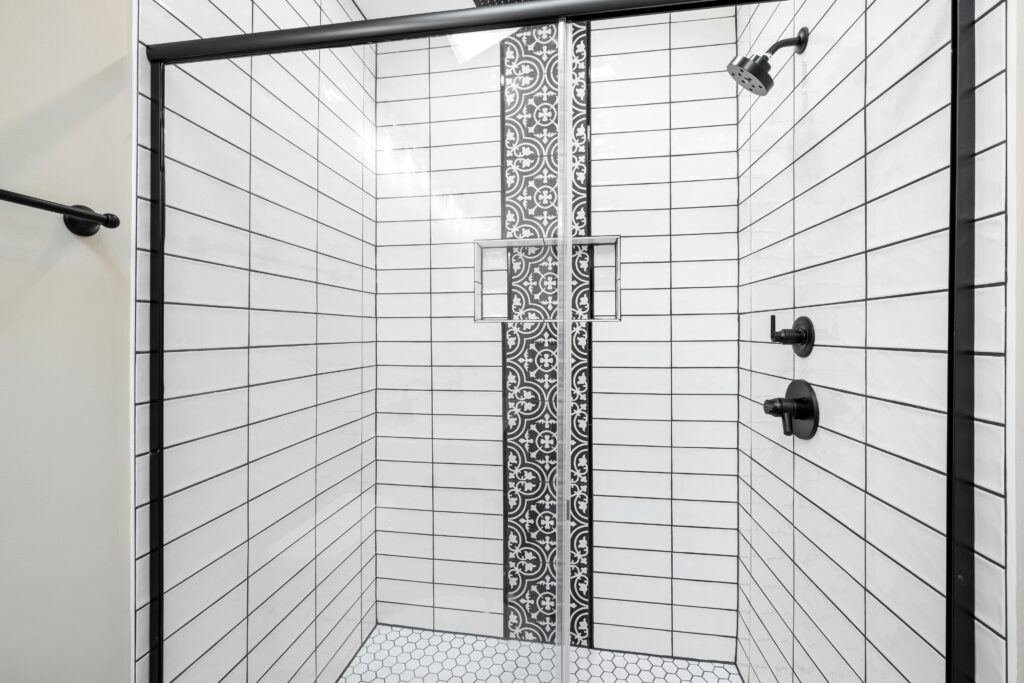
Returning your bathroom to the subfloor and studs is the best way to revitalize a tired, unappealing restroom. From there, you have the creative freedom to reimagine your personal oasis.
We’ve got everything you need to know about a full bathroom remodel here for you.
Let’s dig in!
Before beginning your bathroom remodel, establish a clear budget and timeline. Gather design inspiration and create a checklist of your must-have features. Consider plumbing and electrical updates, material choices, and layout changes.
Cosmetic updates are usually more affordable, won’t require a permit, and you can easily complete them in a weekend with proper planning. These could include something as simple as changing out towel bars, painting, or even changing out a countertop.
Permits are required for any remodel that involves structural, electrical, or plumbing changes. Instead of a quick run to the hardware store, more substantial updates are considerably more expensive.
Understanding your goals for the remodel, budget, and timeframe are all essential first steps before beginning the process. Once you’ve put together a solid plan, you can decide if you’re comfortable DIYing it or if a call to your contractor is in the cards.
We’re focusing on a more substantial renovation for this article. Most large-scale bathroom remodeling projects start with the same first steps.
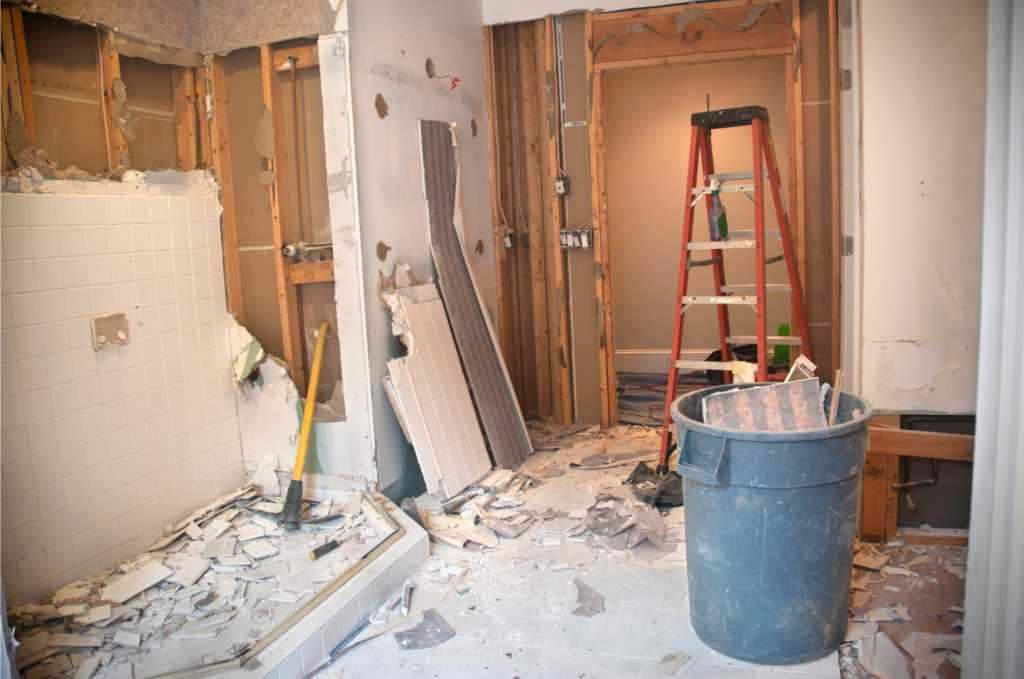
A complete remodel begins with removing all of the fixtures and flooring. It may also include the tub, toilet, and shower surround.
Before you begin, shut the water valve to your sink and toilet. If you’re removing a shower or bathtub, you’ll have to locate the main shut-off valve to your house. When you’ve turned off the water, you can begin removing fixtures.
If you take your bathroom to the studs and subfloor, you can remove tile, drywall, and flooring after you’ve cleared out the fixtures.
When you’ve removed all of the furnishings and fixtures, take this opportunity to inspect for mold, water damage, and structural issues. Dry out any standing water and treat mold and mildew with a fungicide to prevent future problems. You can also remove and patch damaged drywall as necessary.
After you’ve removed any damage and implemented mold remediation, you can prepare the room for the next steps. Level the floor and shore up soft spots in the subfloor to ensure your finished bathroom has a solid foundation.
Preparing your bathroom for new tiles is a straightforward process. As mentioned in the previous section, preparing the subfloor is essential. Because of the level of moisture present in the typical bathroom and the tendency of wood to swell and shift, you can’t tile directly onto the subfloor. Instead, you’ll install underlayment to provide a stable surface.
Grip-Rite MORE™ backer board and tile underlayment is a next-generation alternative to conventional solutions. Portland cement-based products contain VOCs, quartz silica dust, and fiberglass on the surface. When handled or cut inside, these compounds cause eye, skin, and lung irritation. Additionally, the production of portland cement is one of the most significant carbon dioxide contributors in the building industry.
Embrace a sustainable, fire and water-resistant future with our magnesium oxysulfate cement board. It’s lightweight, strong, easy to cut with a carbide-tipped blade, and doesn’t contain quartz silica.
Check out our installation guide for a step-by-step walkthrough.
After installing your cement board, it takes around 24 to 48 hours for the thinset to cure. Choosing your tile is crucial since it is exposed to water in the bathroom environment. Fully glazed porcelain or ceramic tiles are ideal for performance and style.
It’s a good idea to dry-fit your tiles to determine if complex cuts are necessary and ensure you have enough on hand. When you’re happy with the layout, apply thinset using a notched trowel. Work in sections and use spacers to provide a level surface and even grout lines.
Once the thinset has cured, apply the grout to the lines. Clean off excess grout and let it cure before giving it a final wipe-down the next day.
You can protect your tile by sealing it with a product designed for that application. Not every type of tile needs sealing, but natural products like stone do. Always follow tile manufacturer instructions regarding proper installation and maintenance for best results.
When your flooring is cured and sealed, it’s time to bring the final elements to your new bathroom. Reinstall the vanity, sink, toilet, and any other furniture you removed in the demolition stage. Caulk around fixtures that are exposed to water to protect from moisture damage.
If you’re replacing lighting, ventilation systems, or doing any kind of electrical work, switch off the power in your bathroom first.
Finally, install towel bars, mirrors, and shelves. Once you have finished cleaning, your new bathroom is ready to go.
Remodeling your bathroom is a rewarding process. However, because of regular exposure to humidity, it will need special attention. Keep it clean and looking new with these simple tips.
Following these steps will help you achieve a successful and long-lasting bathroom remodel. Grip-Rite MORE™ is the eco-friendly cement backer board and underlayment solution that supports a healthier indoor environment. It protects your tile and subfloor from water damage and provides a strong foundation for your new bathroom projects.
Find out Where to Buy Grip-Rite MORE™ near you. .